How to Reduce Frizz in Wavy Hair: A Practical Routine
Learn how to reduce frizz in wavy hair with a low-friction wash routine, the right conditioner amounts, and fixes for humidity and drying mistakes.
What if the product that finally smooths your waves is also the reason they fall flat by noon? Most advice on how to reduce frizz in wavy hair treats every wave the same, then tells you to add more cream, more oil, or a stronger styler. That can calm flyaways, but it often sacrifices lift, definition, and volume, especially on fine or low-density hair.
A better routine works in the opposite direction. You match the fix to the symptom, your density, porosity, scalp oiliness, and drying habits, then you use the smallest amount that works. You'll get smoother waves without paying for them with limp roots or stringy ends.
Match Each Frizz Symptom to Its Cause
Start with the pattern you see most often, not the product shelf. Frizz after brushing looks different from frizz that blooms in humid air, and each one needs a different first move.
| Symptom | Likely cause | Fix |
|---|---|---|
| Frizz after brushing dry waves | Friction separates curl clumps and creates a halo | Stop dry brushing and detangle while wet with conditioner |
| Halo of frizz after towel-drying | Rough terry rubbing lifts the cuticle | Scrunch with a microfiber towel or cotton T-shirt |
| Frizz within hours of humid air | Hair was not fully dry or was left unsealed | Dry completely and add a light film before going out |
| Limp, greasy-looking frizz | Oil used as the main anti-frizz treatment | Switch to a conditioner or film-forming styler |
| Brittle frizz returning after every wash | Cuticle damage from heat or chemicals | Cut heat and chemical processing and condition more |
How to Read Your Result
Pick one row and test only that fix first. If your halo appears right after you brush, buying a heavier cream won't solve it. If frizz shows up two hours after you leave home, your wash technique may be fine and your drying or sealing step may be the problem.
Humidity ingredients add another layer, which is why our guide to humectants for curly hair is useful when frizz tracks the weather more than your handling. Don't change your towel, conditioner, and styler in the same week. You won't know which change helped, and you may keep a product that's flattening your waves for no benefit.
Practical rule: Change the habit that happens closest in time to the frizz. Immediate frizz points to friction. Delayed frizz points to moisture, drying, or hold.
A healthy result isn't glassy, motionless hair. Your waves should clump in a visible S pattern, keep some movement at the roots, and dry without a fuzzy halo separating from the main shape. A few flyaways are normal. Chasing zero flyaways usually leads to over-conditioning, and that's where definition starts to disappear.
How to Wash and Detangle Wavy Hair Without Friction
Wavy hair resists handling more than straight hair does, so every rough pass costs you definition. The 2024 friction-dynamics study on PubMed measured average inward friction coefficients of 0.47 ± 0.04 for straight hair, 0.51 ± 0.02 for curly hair, and 0.54 ± 0.04 for wavy hair. That higher friction is why slip matters before you touch a comb. Add conditioner first, then manipulate gently and briefly.
Use this low-friction sequence on wash day.
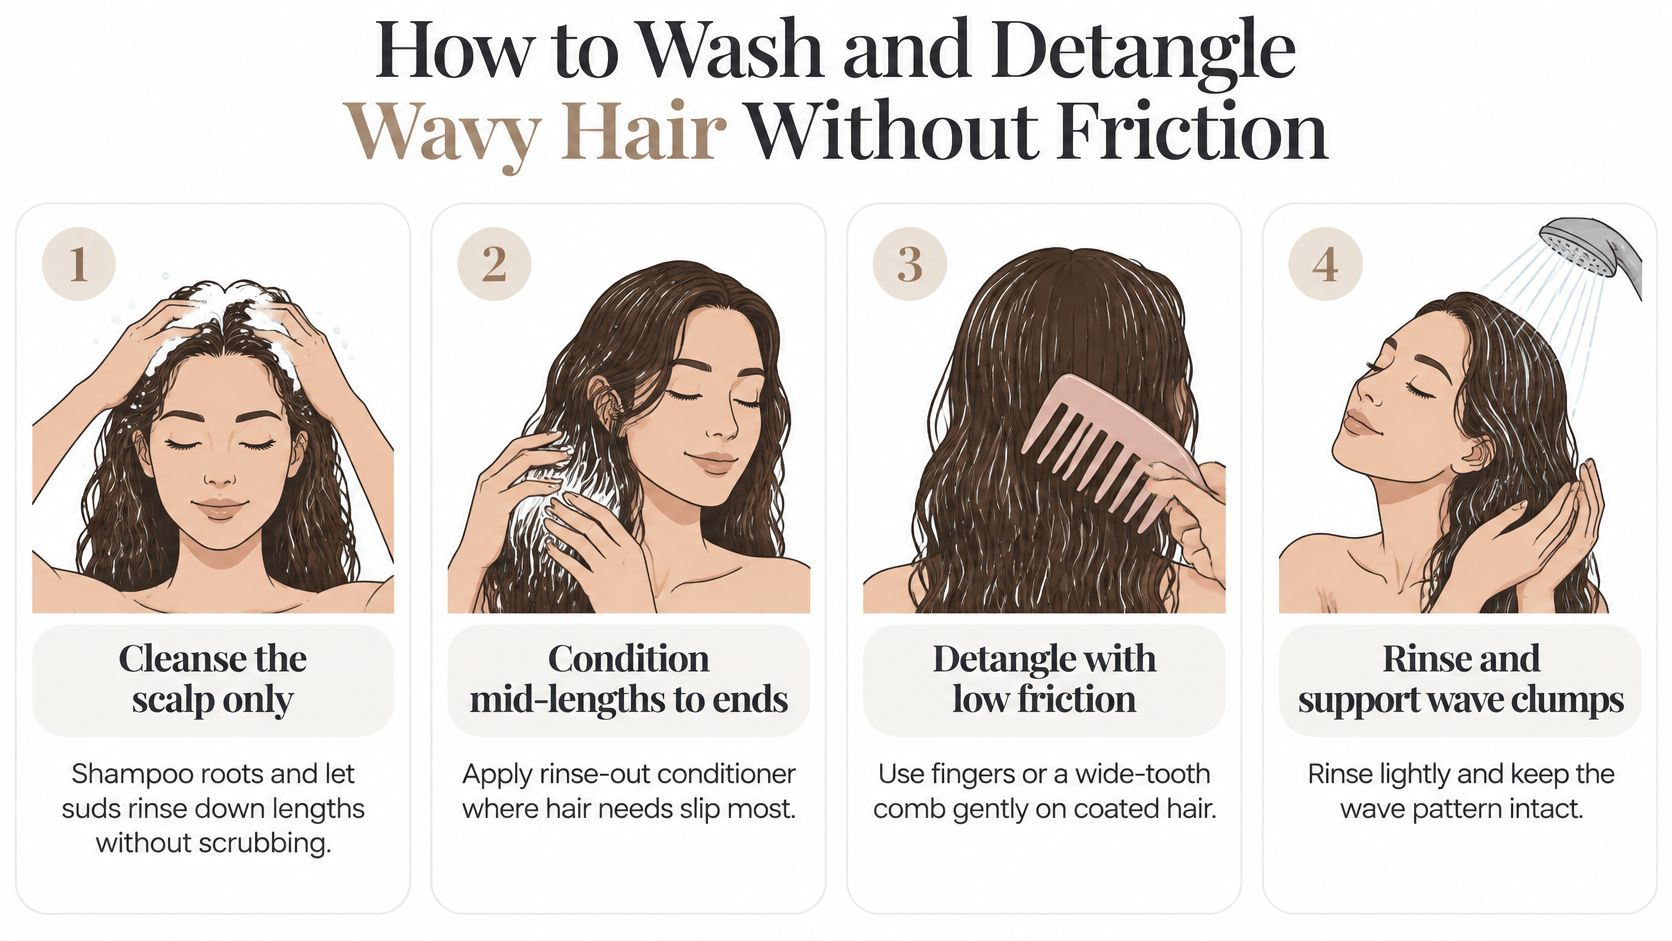
The Six-Step Wash Sequence
- Cleanse the scalp only: Work shampoo through your roots with your fingertips and let the suds rinse down the lengths. Don't scrub the ends as if you're washing fabric. They're older, drier, and easier to rough up.
- Condition mid-lengths to ends: Apply rinse-out conditioner until the hair feels slippery, like wet seaweed. Keep most of it off the roots if your waves are fine or low-density, since root coating steals lift.
- Detangle while saturated: Use your fingers or a wide-tooth comb, starting at the ends and moving upward in small sections. Make only a few passes per section. If the comb catches, add water and a little more conditioner instead of pulling harder.
- Rinse with lukewarm water: Rinse cleanly without wringing or twisting the lengths. Keep the wave clumps pointing downward so they stay grouped.
- Blot, don't rub: Scrunch excess water out with a smooth microfiber towel or cotton T-shirt. Press and lift. Don't twist your hair into a tight turban, which stretches wet strands and distorts clumps.
- Leave it alone: Once you've scrunched, stop touching it while it dries. Repeated checking separates clumps before they've set.
Two Slips That Undo Careful Washing
Don't brush dry waves to remove frizz. You're not smoothing the surface, you're pulling apart the groups that make waves look defined. Don't assume natural oil will make wet detangling easier, either. Oil isn't a substitute for a conditioner that gives reliable slip, and it can leave fine waves looking separated and greasy.
Wet hair stretches more easily, so patience in the shower prevents damage you can't style away later.
After the first week, check two things. Your waves should hold their pattern after washing instead of puffing into separate strands, and detangling should leave little snapped hair in the comb or drain. If you're still fighting knots, increase slip before you increase force. That's the trade I'd make every time.
Pick Conditioner and Styler Amounts by Wave Profile
The same walnut-sized blob of cream that helps coarse, porous waves can erase a fine 2A pattern. Identify your profile before you choose an amount. Judge density by ponytail width and how much scalp shows when your hair is parted. Judge porosity by how quickly clean, product-free hair absorbs water and how long it takes to dry. Fast absorption and fast drying usually point to higher porosity, while water beading and slow wetting point lower.
| Hair profile | Where to apply | Amount | Avoid |
|---|---|---|---|
| Fine or low-density waves | Mid-lengths and ends only | Pea-sized for shoulder length | Heavy butters and rich creams on the roots |
| Medium waves with normal porosity | Mid-lengths to ends, then a light styler on damp hair | Two pea-sized amounts | Stacking several film-forming products |
| Coarse or porous waves | Full lengths, sealed with a light styler | Walnut-sized conditioner plus a few drops of styler | Oil as the only frizz control |
| Chemically treated waves | Ends and mid-lengths with a conditioner that has slip | Two pea-sized amounts, repeated only on rough ends | Repeated high heat without a conditioning break |
Match Placement to Density and Scalp
For fine, low-density waves with an oily scalp, keep leave-in on the ends only and use nothing creamy at the roots. A lightweight spray or a pea-sized amount emulsified in wet palms spreads more evenly than a rich cream. If you want the basics first, our explainer on what a leave-in conditioner does covers where it belongs in the sequence.
Medium-density hair with normal porosity usually needs conditioner through the lengths plus a light styler only when frizz returns. Don't stack a leave-in, cream, gel, and oil by default. Each extra film adds weight, and waves show that weight faster than tighter curls do.
Coarse, porous, bleached, or chemically processed hair sits at the other end. It absorbs water quickly, loses it quickly, and often needs stronger conditioning plus a sealing styler. Reduce heat sessions while you rebuild consistency, because damaged lengths won't hold a smooth clump as reliably. If your scalp is dry rather than oily, add a scalp-focused pre-wash step and keep heavy conditioning on the lengths, not smeared across the scalp to solve two different problems at once.
The American Academy of Dermatology guidance for curly hair advises avoiding dry brushing because it can cause breakage and frizz, and favors low-friction nighttime styles such as a loose ponytail or braid. That advice supports the framework here, but you still need to set the amount by your own density and porosity.
Why Formulation Matters More Than Oil
Silicone-based conditioners can be useful because silicones act as major lubrication agents and reduce interactions between neighboring fibers, as described in the ScienceDirect review of hair conditioning and surface modification. Their hydrophobic surface effect also slows rapid moisture exchange, which helps in humid air. Apply styler to soaking-wet hair, smooth it on with praying hands or gentle raking, scrunch to form clumps, and don't touch it until it's fully dry.
Use the smallest effective amount, especially if your hair is fine or low-porosity. Clarify periodically if your waves go limp, feel coated, or resist wetting under the shower. Two mistakes undo an otherwise good formula choice. Using oil as the main treatment can increase wet friction instead of providing dependable lubrication, and applying product to nearly dry hair distributes unevenly while breaking up clumps you've already formed.
We build a Coil routine from your curl type, porosity, density, and scalp, so product placement isn't treated as one-size-fits-all. Hair advice on the site is general information and not medical advice, and persistent scalp problems or hair loss should be checked by a dermatologist. Judge any new amount across several comparable wash days by definition, volume, and halo frizz, not by how slippery your hair feels in the shower.
Drying and Humidity Habits That Keep Waves Smooth
Humidity frizz is mainly a timing and moisture-exchange problem. Hair styled in drier air absorbs water when the air turns humid, the shaft swells unevenly, and clumps loosen into a halo. The 2025 experimental hair-frizz study reported by Cosmetics & Toiletries found that samples styled at 40% relative humidity and then exposed to 80–90% relative humidity showed increased frizz.
That jump is exactly what happens when you leave an air-conditioned office for a humid street.
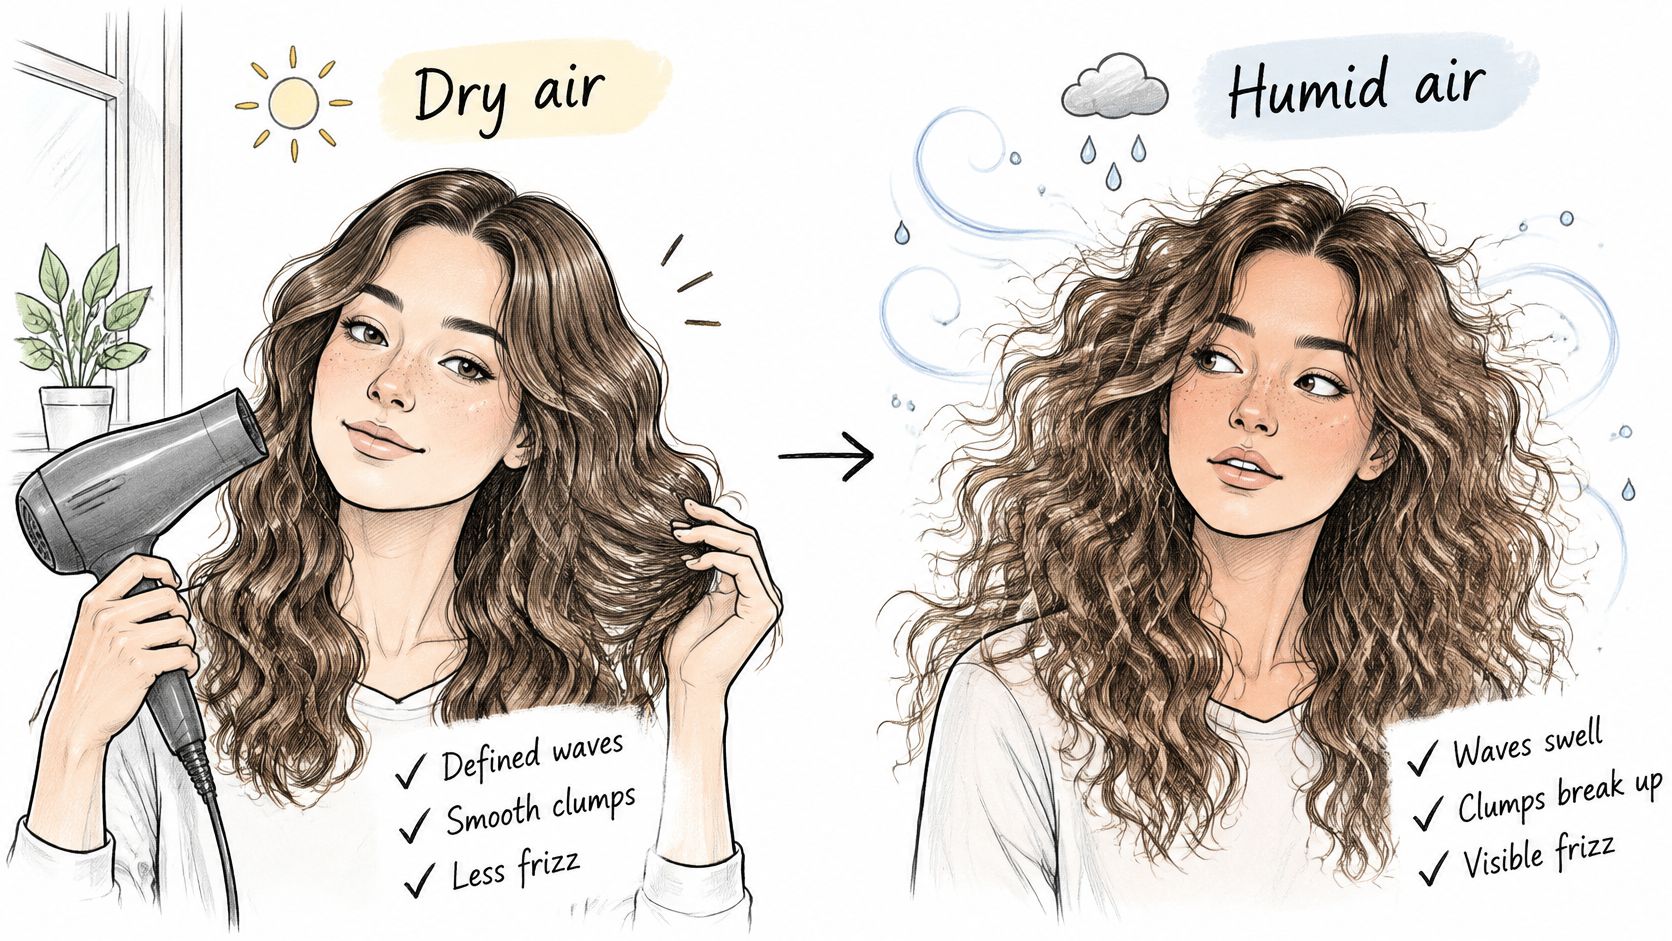
Three Moves for Humid Days
- Finish drying before you leave: Blot first, then air-dry without touching or diffuse fully. Hair that's cool and damp at the roots isn't dry, even if the ends feel finished. Our guide on how to diffuse curly hair is worth using if diffusing usually gives you volume but extra fuzz.
- Refresh with water, not a rewash: Carry a small spray bottle, mist only the frizzy sections, smooth with wet palms, and scrunch the ends. A light reset restores clumps without another full product layer.
- Contain hair overnight: Sleep with your hair in a loose braid or loose ponytail and use a smoother pillowcase fabric if cotton roughs up your pattern. The goal is containment without tension.
Watch the drying technique in practice before you change your products again.
Don't add more product when moisture absorption is the cause. Extra cream can weigh waves down while humid air still enters through an incomplete or disturbed film. On each humid day, record humidity or rain, whether your hair was fully dry, your drying method, and when frizz first appeared. Over several days, that log separates a drying problem from a product problem far better than memory does.
Test One Change Over Three Wash Days
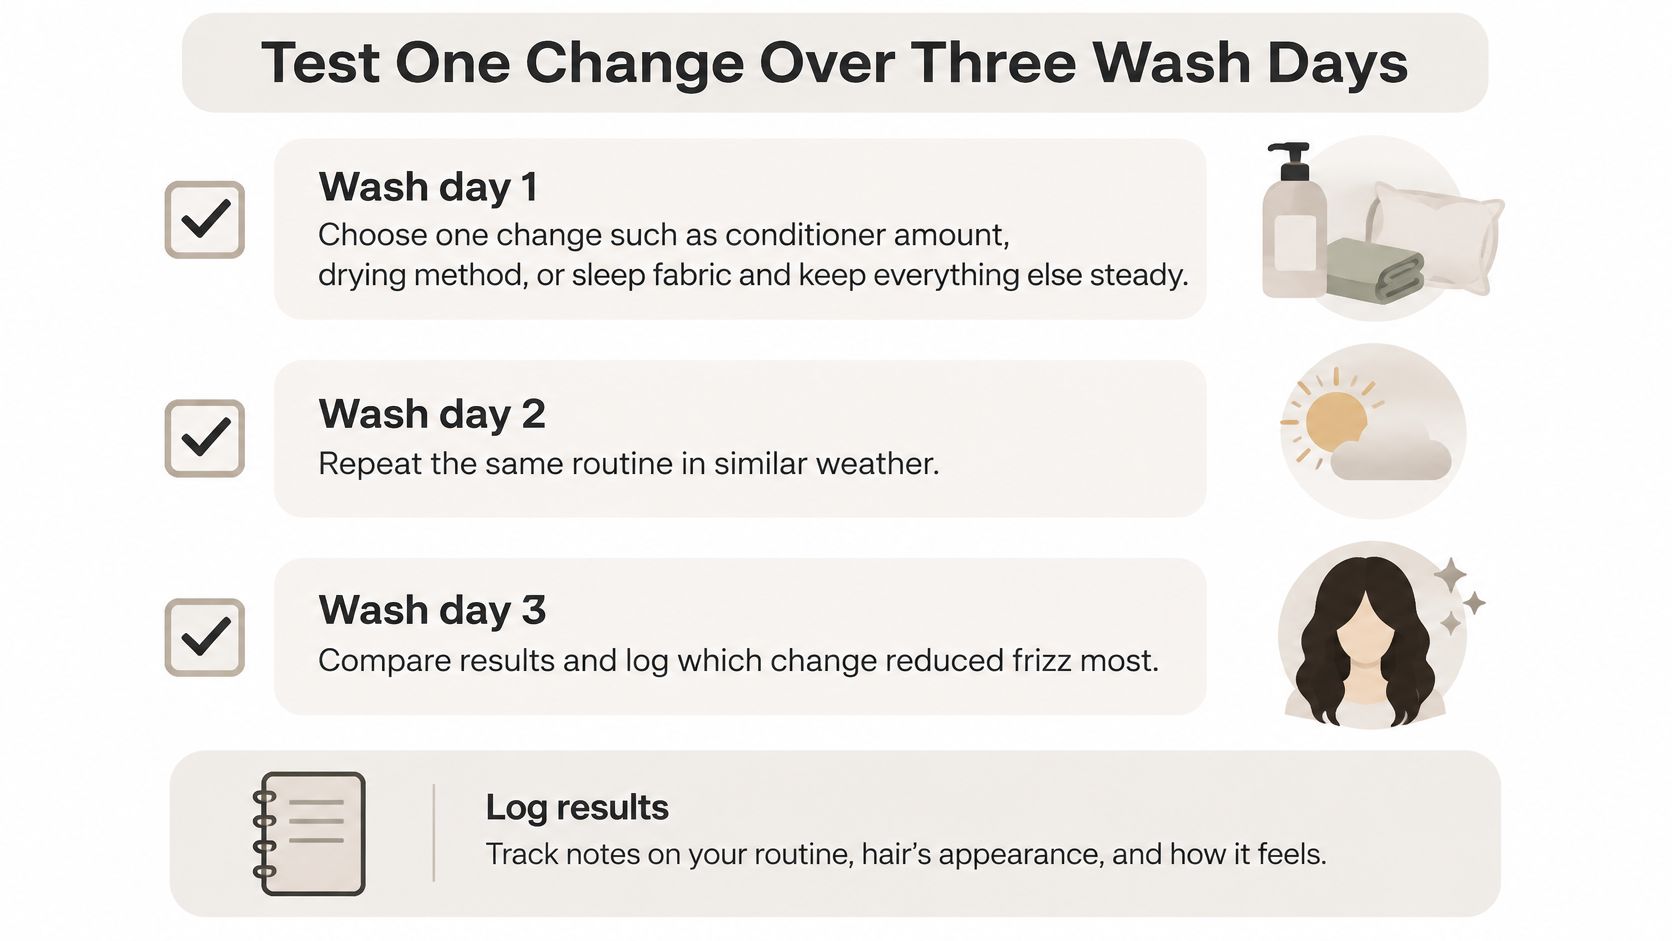
Pick one change for the next week and keep everything else steady. It could be conditioner amount, drying method, styler timing, or sleep fabric. I would start with the cheapest fix that matches your symptom, which is usually stopping dry brushing, changing your towel technique, or drying fully before you go outside.
Run the same routine across three comparable wash days in similar weather. Don't judge a styler on a rainy Monday against a different styler on a dry Friday. Weather will win that comparison and you'll blame the wrong step.
What to Log Each Time
- Conditions: Note humidity or rain, product amount, and drying time.
- Right after drying: Check whether waves clumped and whether the roots kept lift.
- Two hours later: Look for a halo forming at the crown or around the face.
- End of day: Rate overall frizz, softness, and whether the product feels heavy.
Then answer four questions. Did the waves clump after drying? Did a halo appear within the day? Did volume stay where you want it? Did the product feel heavy by day two?
If two of the four answers improve across the three wash days, keep the change. If not, revert that one step and test a different one.
A written log matters because fiber damage and weather can look like routine failure. You might discover that your conditioner amount is right, but your hair is still damp when you start your commute. You might also find that a styler controls frizz beautifully on day one and makes fine waves stringy by day two, which tells you to halve the amount rather than discard it.
Coil can hold that test in one place. The daily check-in consists of ticking off what you did, rating how your curls feel, and optionally adding a selfie. The AI hair scan reads frizz, definition, and moisture from a selfie you add at check-in, and Coil lines your curl score up against your products and habits so the routine gets sharper. That gives your three frizz checks context beside the exact amount and drying method you used.
Start this week with one change, not five. Write down the result while you can still see it, repeat it twice more, and let the pattern decide. That's how you reduce frizz in wavy hair without slowly styling the wave out of it.
Start your three-wash-day test with a routine matched to your wave pattern, porosity, density, and scalp, then track whether frizz drops without losing lift. Coil pairs daily check-ins with photo-based feedback on frizz, definition, and moisture, so you can see which change worked. Open Coil today, set up your profile, and log your next wash day before you buy another anti-frizz product.