How to Air Dry Curly Hair Without Frizz or Heat Damage
Learn how to air dry curly hair with a step-by-step routine, drying times by curl type, and fixes for frizz, flat roots and slow drying.
You washed your hair at seven, worked styler through soaking-wet curls, and left them alone. It's past ten now. The crown is still cool against your scalp, the roots have given up and flattened under the weight of the water, and you're standing in the bathroom deciding between a wet pillow and the dryer you've been told will wreck everything.
Neither option is the actual problem. The trouble is that nobody told you when waiting stops helping.
Air-drying and diffusing get sold as opposing camps, one virtuous and one damaging. They aren't. They're two tools with different costs, and the useful skill is knowing which one your hair needs on a given night. Here is how to air dry curly hair with a measurable checkpoint instead of a guess, plus the amounts, timings and fixes that make the difference between defined clumps and a frizz halo by lunchtime.
Product Amounts and Drying Times by Curl Type
The quickest fix for an air dry that goes wrong isn't a new product. It's matching the amount you apply and the window you expect to your actual pattern. Change both at once and you learn nothing.
| Curl pattern | Styler amount per section | Expected drying window | Main frizz risk |
|---|---|---|---|
| Wavy 2A-2C | Light gel or mousse, about a golf-ball amount | 1-3 hours | Flatness at the roots |
| Curly 3A-3C | Leave-in plus gel, about a walnut-size amount | 2-5 hours | Halo frizz from handling |
| Coily 4A-4C | Cream plus gel, a generous amount | 3-8 hours | Moisture loss and dry ends |
Treat the window as a starting point for tracking, not a promise. Humidity stretches every number in that column, and thick density adds time on top, because water has further to travel from the scalp out to the ends.
How to scale the amount for density and length
Fine or thin hair needs less than the row suggests, sometimes two-thirds of it, and heavy cream will collapse waves that a light gel holds beautifully. Dense hair and long lengths need more, and the increase comes from more sections, not a heavier pass. Each section gets its own portion. One big palmful spread across the whole head leaves the underlayer bare and the canopy greasy.
Take a reader with 3B curls, shoulder length and dense: a walnut-size amount of leave-in and gel per section, four to six sections, roughly three hours to dry. If your hair is fine and collapses under cream, the fine curly hair routine is the better starting point.
The dryness test: the roots are dry to the touch, there's no cool damp patch at the nape, and a clump holds its shape when you press it lightly with two fingers.
If the clump collapses on contact, it's still wet inside. That's the signal to keep waiting or to bring in brief low heat, not to scrunch and hope.
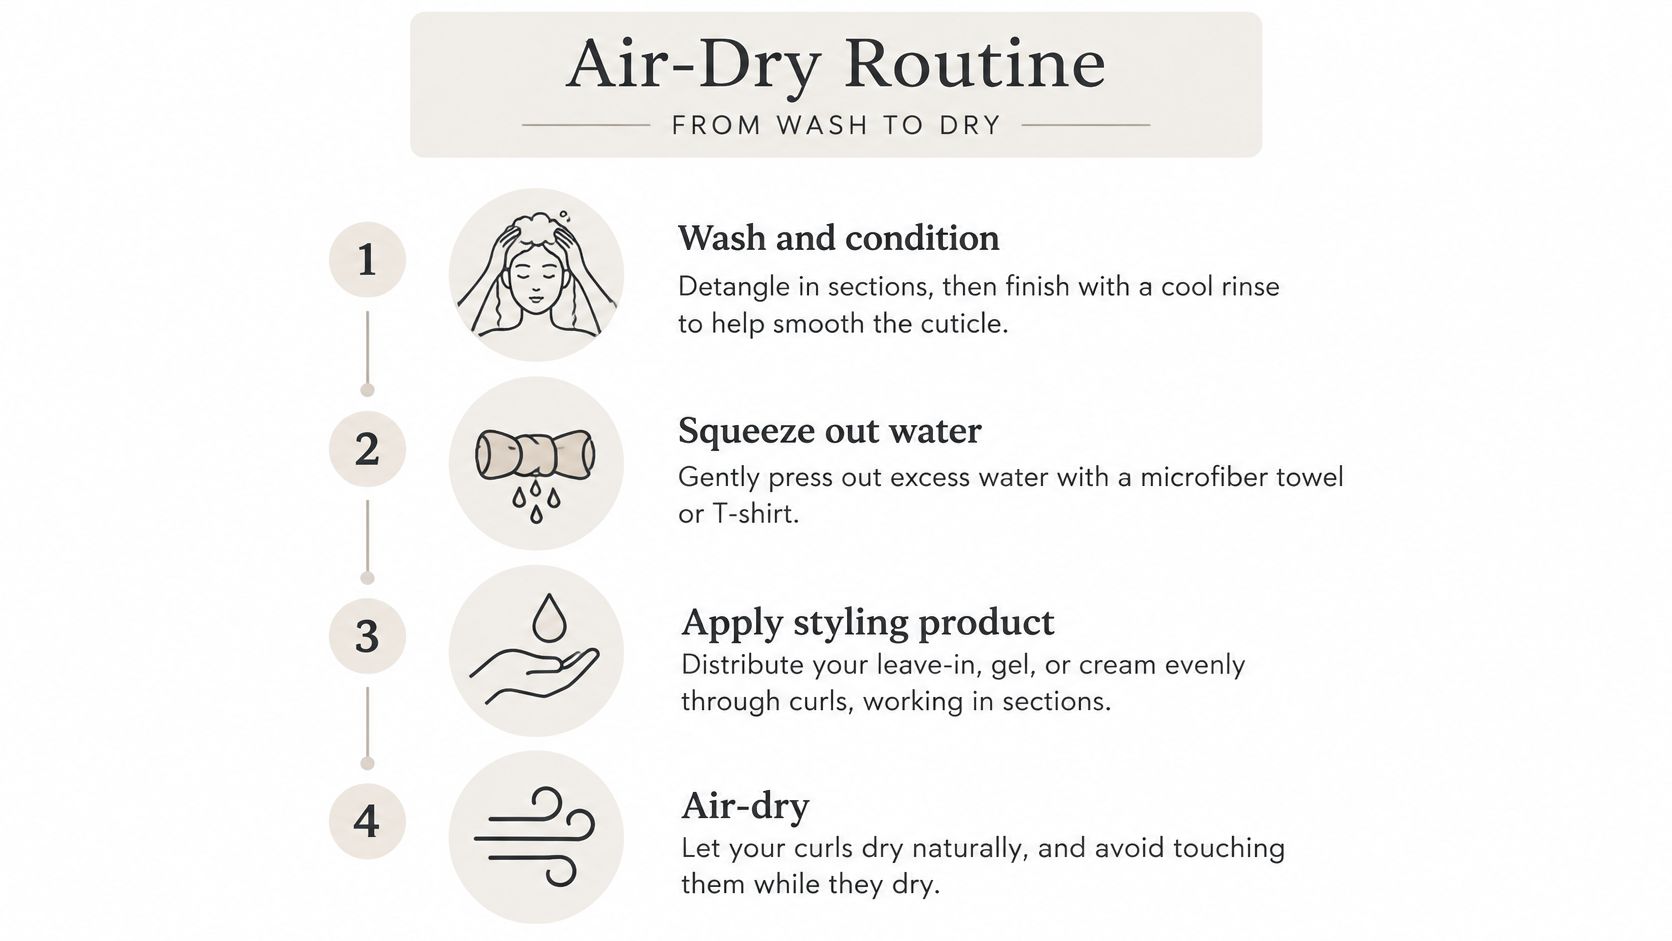
Air-Dry Routine From Wash to Dry
Run this sequence exactly as written the first time, then adjust one step per wash. The order matters more than the products.
- Wash and condition with the hair detangled in sections. Work conditioner through with your fingers or a wide-tooth comb while it's slippery, never on dry hair. Finish with a cool rinse, which lays the cuticle flatter and leaves the surface smoother before you style.
- Squeeze, don't wring. Press water out from mid-lengths to ends with flat palms. Wet hair stretches, and twisting it distorts the curl pattern you're about to set.
- Blot with a smooth microfiber towel or an old cotton T-shirt. Scrunch upward, don't rub. Terry cloth loops catch the cuticle and rough it up, which is exactly the friction that shows up later as frizz.
- Apply styler while the hair is still very wet. Work from ends to roots with a praying-hands motion, palms flat, so each clump gets coated without being pulled straight. Product on hair that has already started drying sits on the surface and gives no hold.
- Arrange clumps with your fingers and separate only where roots lie flat. Every extra rake breaks a clump apart.
- Stop touching. No combing, scrunching or hands in the hair until it's dry. Check dryness at the roots and the underlayer, not the shiny outer surface.
The American Academy of Dermatology hair styling guidance recognises air-drying as an alternative to towel drying and recommends letting hair partially air-dry before styling or combing to reduce damage, which is why blotting beats rubbing in this routine. If you layer two products, the order decides whether you get hold or slip, and curl cream vs gel settles which goes on first.
Dry in a stable, ventilated room. A steamy bathroom after a hot shower keeps the air saturated and adds an hour to your window.
The most common slip: applying styler to hair that's already half dry. You get soft, undefined hair with nothing holding the clump together, and it looks like a product failure when it's a timing failure.
Success shows up the next morning, in daylight: clumps that are still distinct, a soft rather than crispy feel after you break the cast, and few enough flyaways that you don't reach for a styling cream.
How Long Is Too Long to Stay Wet
Here's the decision rule. At the roots and the nape, check the hair at three hours after you finish styling. For wavy and curly hair, if those areas are dry, keep air-drying and leave the dryer alone. If they're still cool and damp, you've hit your threshold and a short diffuse is now the better move. Coily hair gets a five-hour checkpoint because the window runs longer.
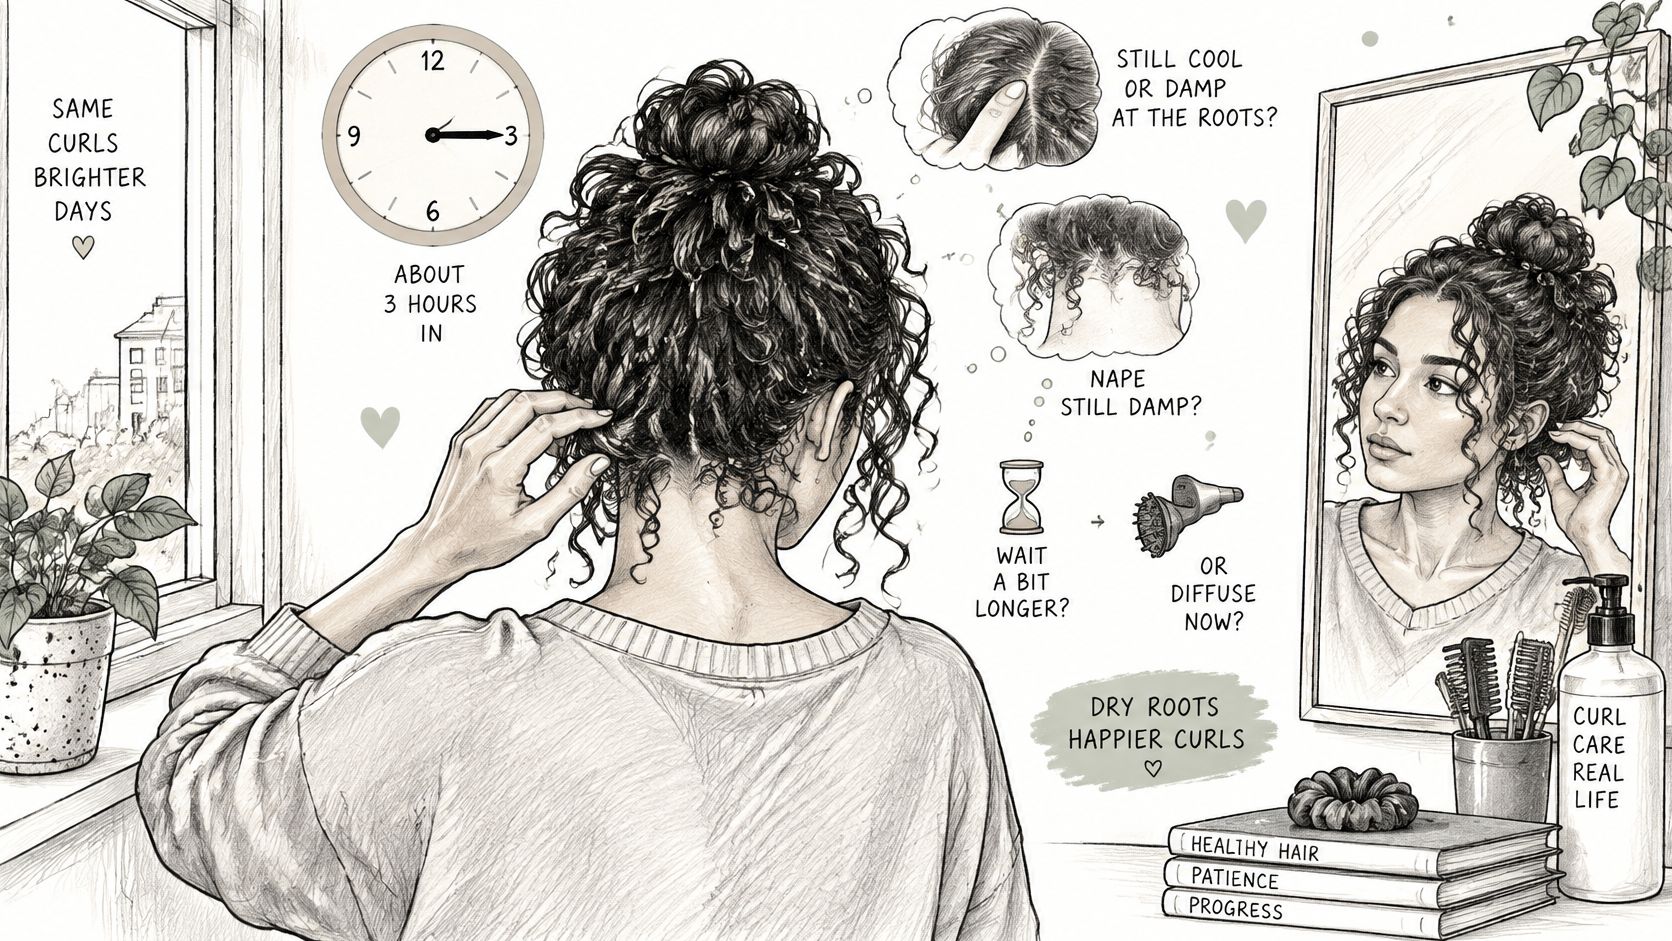
Four things push you past that checkpoint: density that traps water near the scalp, humid air that slows evaporation, a late-evening wash, and long hair holding water in the ends. Curly-hair communities describe exactly this middle ground, with wet times running from 3 to 8 hours, curls flattening under their own weight, and humidity stretching the whole process, as discussed in this r/curlyhair thread on diffusing.
The middle path often overlooked is a five to ten minute session on low warm heat at the roots to lift volume and break the wet mass, then finishing by air. You get root support without cooking the mid-lengths.
Reading your checkpoint result
- Roots dry at the checkpoint: air-dry only, and note the time it took so next wash is easier to plan.
- Roots damp, dense hair or humid day: brief low-airflow diffuse at the scalp, then air-dry the rest.
- Very wet, long hair, late wash: section the hair first, blot again, then air-dry with the roots exposed rather than piled on top of your head.
Keep a short log for two weeks: wash time, density, humidity, and what the checkpoint showed. That's how a generic rule becomes your threshold.
Adjust by season. Central heating in winter dries the air and can pull your window shorter, while summer humidity adds time and argues for the diffuse half of the routine.
Diffuser Settings That Limit Heat Exposure
Heat isn't a yes or no. It's a combination of temperature, distance and time, and a 2011 laboratory study tested three combinations against room-temperature drying at 20°C, across 30 repeated drying treatments.
| Setting | Distance | Time per pass | Use it for |
|---|---|---|---|
| Low warm, about 47°C | 15 cm, moving continuously | 60 seconds | Roots and nape once the checkpoint is reached |
| Medium, about 61°C | 10 cm, moving continuously | 30 seconds | Short, targeted passes on very dense roots only |
| High, about 95°C | 5 cm | 15 seconds | Avoid on curly and coily hair |
Read the rows as a heat budget. The 2011 hair fibre study indexed on PubMed found surface damage increased as temperature rose, with the closest, hottest condition producing the greatest cuticle deterioration. It also found something less convenient for no-heat purists: naturally dried samples showed structural changes in the cortex, while the 47°C condition at 15 cm, kept moving, caused less overall damage.
That gives you four rules. Keep the diffuser moving, always, so no single spot collects heat. Stay at low or warm rather than high. Hold distance, roughly a hand's width, instead of pressing the bowl to the scalp. Limit passes to the roots and nape, where water lingers.
Say you have fine 2B waves and need a faster finish before work. Low setting, 15 cm away, about a minute at the crown with the bowl moving, then hands off.
Where the evidence stops: these were controlled hair fibres. Your result depends on porosity, chemical processing and density, so treat the settings as limits to stay inside rather than a recipe for perfect curls.
The default stays simple. Air-dry first, and diffuse only when your checkpoint says waiting has stopped paying off.
Frizz, Flat Roots and Slow Drying Fixes
Diagnose before you buy. Most air-dry problems trace back to one habit, and the fix is usually a change in handling rather than a new bottle.
| Symptom | Likely cause | Fix |
|---|---|---|
| Frizz halo by midday | Towel friction or touching during drying | Blot with a T-shirt and stop touching until dry |
| Flat roots | Hair left wet too long or product on the crown | Use less product at the roots and a short low diffuse at the crown |
| Stringy clumps | Too much product | Apply a lighter layer, then gel |
| Slow drying past eight hours | Dense hair in humid air | Section the hair and use the three-hour checkpoint |
| Dry, rough ends | Long air-drying on porous ends | Seal the ends with a leave-in before wetting |
| Persistent scalp itch or flaking | Product buildup or scalp condition | See a dermatologist if it persists |
Some of these turn around after a single wash. Product amount and touching are immediate: change either and tomorrow morning looks different. Ends and moisture take a week or more of consistent tracking before you can trust the result, which is why one bad morning isn't evidence that a routine failed.
The frizz halo deserves a closer look, since it's the complaint people bring up most. A halo usually means the cuticle was roughened while the hair was wet and vulnerable, then dried in that state. The guide to why curly hair gets frizzy covers the cuticle side in more detail than a single fix can.
Change one variable per wash
If you shorten drying time, reduce product and switch towels in the same wash, you can't tell which change helped. Pick one. Run it. Judge it the next morning.
Scalp symptoms are the exception to self-troubleshooting. Hair advice here is general information and not medical advice, so if itching or flaking continues after you've cut back on heavy creams and rinsed thoroughly, have a dermatologist look at it rather than cycling through shampoos.
Confirm Your Curl Routine Works Next Wash
Judge the routine across three washes, not one. After each wash, note the drying time to the nearest half hour, how defined the curls looked at breakfast, how much frizz appeared by mid-afternoon, and take a photo in the same daylight spot each time. Consistency of light matters more than the camera.
Then read the pattern. Definition good and frizz low means keep the routine exactly as it is, which is harder than it sounds. Frizz rising points back to towel friction and hands in the hair during drying. Roots flat means the wet period ran too long or product landed on the crown, so shorten the wait or check the checkpoint earlier.
Change a single variable per wash, whether that's product amount, drying position or blotting method, so the cause of any improvement is obvious. Match the amounts to the row for your pattern rather than to a number you saw elsewhere, because a 4C coil and a 2A wave tolerate very different loads.
Tracking several washes by memory doesn't work. The Coil app builds a routine from your curl type, porosity, density and scalp, supports wavy 2A-2C, curly 3A-3C and coily 4A-4C hair at any length, and reads frizz, definition and moisture from a selfie you add at check-in, which turns feel into a record you can compare.
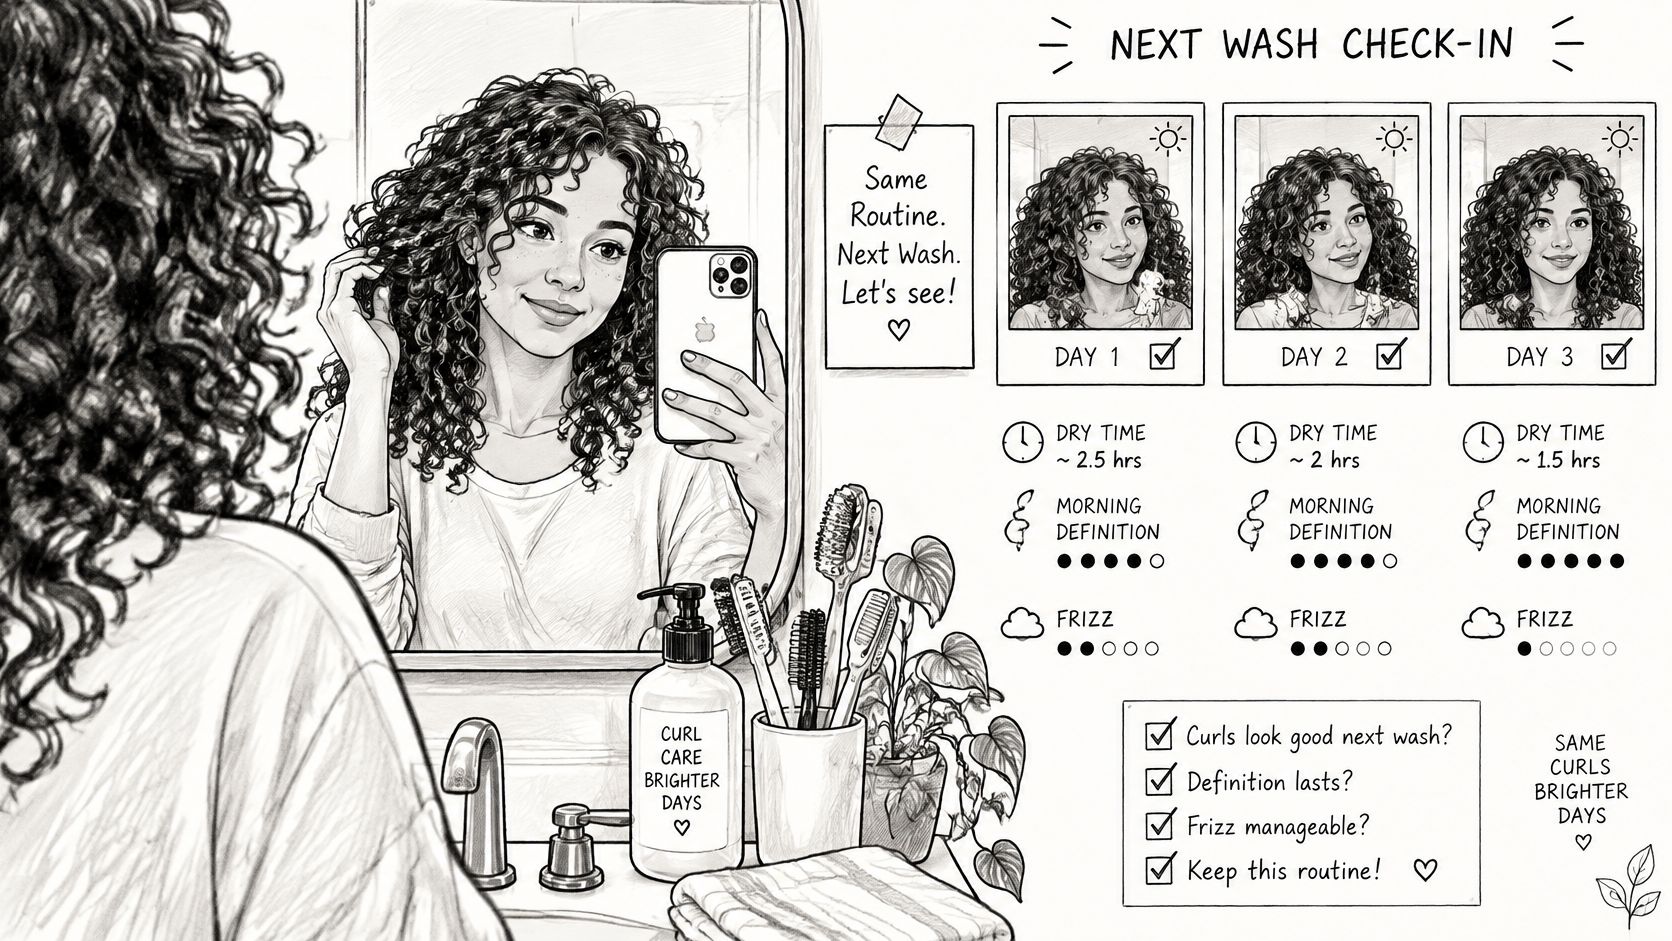
Pick the amounts row for your pattern, run the routine on your next wash, and write down what the three-hour or five-hour checkpoint showed. That single record tells you more than any general recommendation.
Coil turns the checkpoint into a routine you can actually follow, adapting your wash-day steps to your curl pattern, porosity, density and scalp, then tracking what worked through a 20-second daily check-in and a selfie scan that scores definition, frizz and moisture. If air-drying has been a coin flip, it gives you a record of which variables moved the result. Start at Coil and let the next few wash days answer the question.